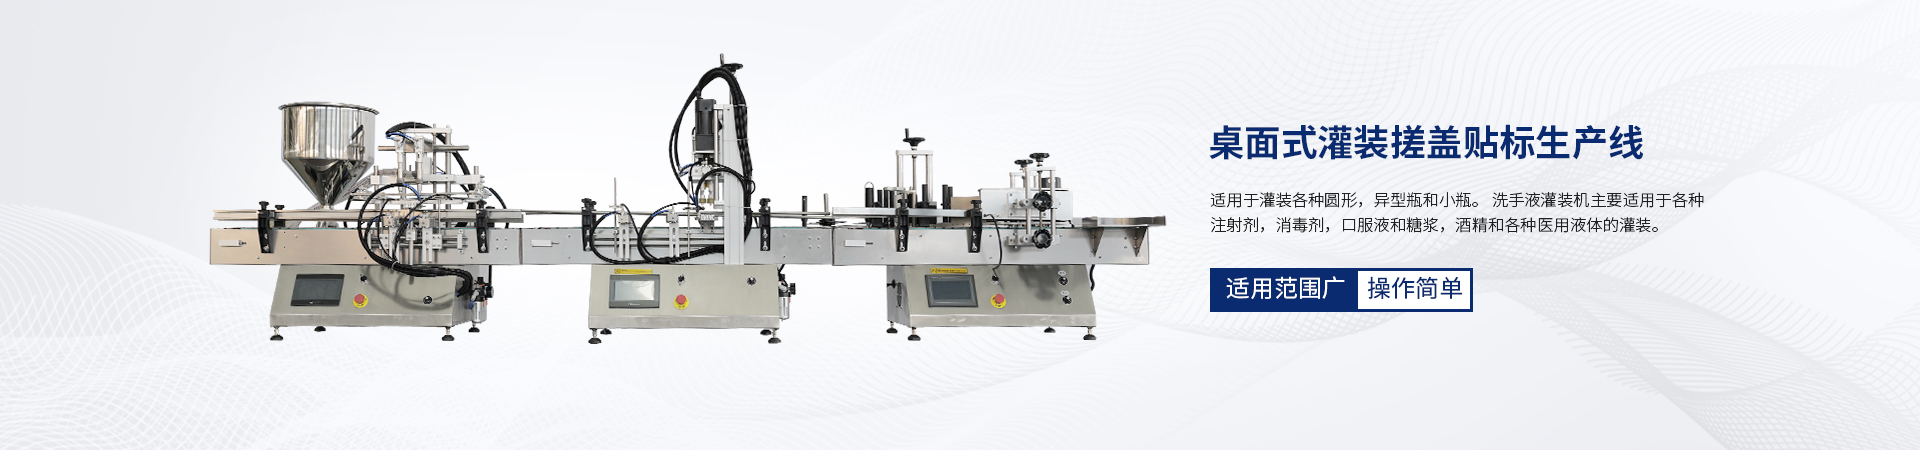
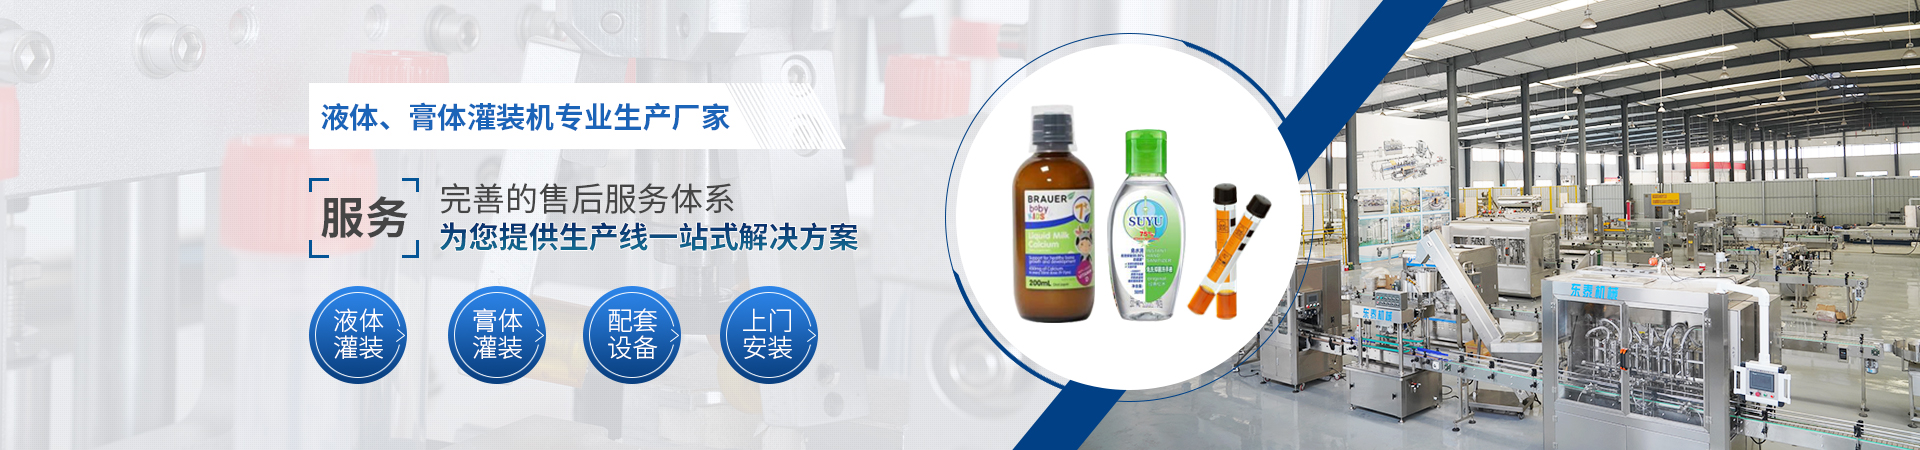
akwei的开发笔记

2012年02月29日

iOS 使用 md5加密

类归于: ios相关 — admin @ 6:08 下午

#import <CommonCrypto/CommonDigest.h>

@implementation MD5Util

+(NSString *)encode:(NSString *)value{

[value retain];

const char *cStr = [value UTF8String];

[value release];

unsigned char result[16];

CC_MD5( cStr, strlen(cStr), result ); // This is the md5 call

return [NSString stringWithFormat:

@"%02x%02x%02x%02x%02x%02x%02x%02x%02x%02x%02x%02x%02x%02x%02x%02x",

result[0], result[1], result[2], result[3],

result[4], result[5], result[6], result[7],

result[8], result[9], result[10], result[11],

result[12], result[13], result[14], result[15]

];

}

@end

2012年01月9日

解决C3P0在Linux下Failed to get local InetAddress for VMID问题

类归于: web开发 — 标签: — admin @ 12:10 上午

转载 http://jooben.blog.51cto.com/253727/320623

昨天部署两台机器,同时连接的数据库是第三台机器,其中一台生产机运行是发生异常:
报错代码:
Failed to get local InetAddress for VMID. This is unlikely to matter. At all. We’ll add some extra randomness
java.net.UnknownHostException: p2p-8-41: p2p-8-41
源码大概是这段:
public final class C3P0ImplUtils {
try{
dos.write( InetAddress.getLocalHost().getAddress() );
}catch (Exception  e)
{
if (logger.isLoggable(MLevel.INFO))
logger.log(MLevel.INFO, “Failed to get local InetAddress for VMID. This is unlikely to matter. At all. We’ll add some extra randomness”, e);
dos.write( srand.nextInt() );
}
}
….
那么:p2p-8-41是怎么得来的呢?
[root@p2p-8-41 ~]#     cat /etc/sysconfig/network
NETWORKING=yes
NETWORKING_IPV6=no
HOSTNAME=p2p-8-41
很明确了吧!
解决办法:
搜索谷歌和百度,整合一些资料:
主要是因为系统没有找到主机名p2p-8-41对应的IP,修改Linux的hosts文件即可。具体操作步骤如下:
vi /etc/hosts
在行127.0.0.1  localhost localhost.localdomain 后加上 p2p-8-41保存即可。
Linux查找域名时通常指先查找文件/etc/hosts,找不到时再向DNS服务器请求。
127.0.0.1               localhost.localdomain localhost p2p-8-41
原因分析:
Linux于host相关的几个文件如下:
/etc/host.conf
功能:指定主机名查找方法,通常指先查找文件/etc/hosts,找不到时再向DNS服务器请求。
对于大多数用户不用改动此文件内容。
Linux: /etc/host.conf文件内容
order hosts, bind
multi on
/etc/resolv.conf
文件功能:DNS客户机配置文件,设置DNS服务器的IP地址及DNS域名
相关文件:/etc/host.conf
文件格式:
domainname 域名
search 域名
nameserver Primary_DNS_Server_IP_address
nameserver Second_DNS_Server_IP_address
其中domainname和search可同时存在,也可只有一个;nameserver可指定多个
/etc/hosts
#/etc/hosts
#文件格式: IPaddress hostname aliases
#文件功能: 提供主机名到IP地址的对应关系,建议将自己经常使用的主机
# 加入此文件中,也可将没有DNS记录的机器加入到此文件中,
# 这样会方便网络应用
127.0.0.1 localhost localhost.localdomain
资料参考文章:http://www.hlmz.org/forum/redirect.php?tid=268&goto=lastpost

2011年09月21日

NSInvocation简单使用

类归于: 未分类 — 标签:, — admin @ 7:04 下午

在 iOS中可以直接调用 某个对象的消息 方式有2中

一种是performSelector:withObject:

再一种就是NSInvocation

第一种方式比较简单,能完成简单的调用。但是对于>2个的参数或者有返回值的处理,那就需要做些额外工作才能搞定。那么在这种情况下,我们就可以使用NSInvocation来进行这些相对复杂的操作

NSInvocation可以处理参数、返回值。会java的人都知道反射操作,其实NSInvocation就相当于反射操作。

下面这个例子描述了如何使用NSInvocation,以下例子中如果要正常运行,需要把不存在的类进行正确填写。

//方法签名类,需要被调用消息所属的类AsynInvoke ,被调用的消息invokeMethod:

NSMethodSignature *sig= [[AsynInvoke class] instanceMethodSignatureForSelector:@selector(invokeMethod:)];

//根据方法签名创建一个NSInvocation

NSInvocation *invocation=[NSInvocation invocationWithMethodSignature:sig];

//设置调用者也就是AsynInvoked的实例对象,在这里我用self替代

[invocation setTarget:self];

//设置被调用的消息

[invocation setSelector:@selector(invokeMethod:)];

//如果此消息有参数需要传入,那么就需要按照如下方法进行参数设置,需要注意的是,atIndex的下标必须从2开始。原因为:0 1 两个参数已经被target selector占用

NSInteger num=10;

[invocation setArgument:&num atIndex:2];

//retain 所有参数,防止参数被释放dealloc

[invocation retainArguments];

//消息调用

[invocation invoke];

//如果调用的消息有返回值,那么可进行以下处理

//获得返回值类型

const char *returnType = sig.methodReturnType;

//声明返回值变量

id returnValue;

//如果没有返回值,也就是消息声明为void,那么returnValue=nil

if( !strcmp(returnType, @encode(void)) ){

returnValue =  nil;

}

//如果返回值为对象,那么为变量赋值

else if( !strcmp(returnType, @encode(id)) ){

[invocation getReturnValue:&returnValue];

}

else{

//如果返回值为普通类型NSInteger  BOOL

//返回值长度

NSUInteger length = [sig methodReturnLength];

//根据长度申请内存

void *buffer = (void *)malloc(length);

//为变量赋值

[invocation getReturnValue:buffer];

//以下代码为参考:具体地址我忘记了,等我找到后补上,(很对不起原作者)

if( !strcmp(returnType, @encode(BOOL)) ) {

returnValue = [NSNumber numberWithBool:*((BOOL*)buffer)];

}

else if( !strcmp(returnType, @encode(NSInteger)) ){

returnValue = [NSNumber numberWithInteger:*((NSInteger*)buffer)];

}

returnValue = [NSValue valueWithBytes:buffer objCType:returnType];

}

到此为止,这个例子就可以正常的进行调用了

我想客户端可以下载了

类归于: 未分类 — 标签: — admin @ 11:02 上午
我想客户端的下载方式如下:
1:
通过电脑下载,然后导入到手机
2:
添加www.appchina.com客户端
到页面 http://www.appchina.com/soft_detail_9999_0_10.html 中下载 AppChina应用汇 客户端,通过此客户端可以搜索 “我想”然后进行下载
3:
添加 http://sc.hiapk.com/ 客户端
到页面 http://sc.hiapk.com/himarket  下载手机客户端,通过此客户端可以进行我想 的下载
目前我想客户端android系统为2.2

我想客户端的下载方式如下:

1:

通过电脑下载,然后导入到手机

2:

添加www.appchina.com客户端

到页面 http://www.appchina.com/soft_detail_9999_0_10.html 中下载 AppChina应用汇 客户端,通过此客户端可以搜索 “我想”然后进行下载

3:

添加 http://sc.hiapk.com/ 客户端

到页面 http://sc.hiapk.com/himarket  下载手机客户端,通过此客户端可以进行我想 的下载

目前我想客户端android系统为2.2

4:

已经在91助手发布了我想android版本

http://mobile.91.com/Soft/Android/com.dev3g.test.iwant-1.0.html

5:

已经在安智网发布

http://www.goapk.com/

2011年03月3日

一个支持图文混排的coretext开源包

类归于: 未分类 — admin @ 4:50 下午

源代码如下:

https://github.com/Cocoanetics/NSAttributedString-Additions-for-HTML

目前这个包对中文支持的不理想

问题1

例1

<a href=”http://www.google.com”>akweiwei 袁唯</a>,当触摸事件发生的时候,会发现一个链接实际上会成为2个链接 akweiwei 是一个 ,袁唯是一个.

例2

<a href=”http://www.google.com”>akweiwei 袁伟</a>,当触摸事件发生的时候,会发现一个链接实际上会成为3个链接 akweiwei 是一个 ,袁是一个,伟是一个。这样最中效果不是很友好

问题2:

是边距,原作者把边距设定为5,这样会让其他使用者无法真正的空值边距。

问题3:

是行间距,原作者没有设定行间距。所以就会出现当有一行文字中出现中文而相邻的2行没有中文时,间距就会有明显的不一样。

目前我已经做了修改,但是没有放到作者提供的git上。主要是因为我还不会使用git。

对于代码我已经做了修改,修复了上述3个问题,由于我这里无法传附件,

我把他传到了tiny4cocoa.com 的地盘。

http://tiny4cocoa.com/thread-641-1-1.html

欢迎指正

2011年02月21日

如何使用coretext输出文本

类归于: ios相关 — 标签:, — admin @ 5:39 下午

在ios中,进行文本样式设计目前有2种方式: UIWebView ,core text

下面我将通过一个例子来讲述一下如何使用coretext来进行文本样式的添加。

本文章参考:

http://web.archiveorange.com/archive/v/nagQXJDPDGVNz9LFLmSK

http://www.cocoanetics.com/2011/01/befriending-core-text/

首先,进行创建一个UIView的子类,并实现如下代码:

- (void)drawRect:(CGRect)rect {
// Drawing code.

//创建要输出的字符串
NSString *longText = @”袁唯来来 Lorem ipsum dolor sit amet, Before the iPad was released you had basically two ways how to get text on screen. Either you would stick with UILabel or UITextView provided by UIKit or if you felt hard-core you would draw the text yourself on the Quartz level incurring all the headaches induced by having to mentally switch between Objective-C and C API functions.\
As of iOS 3.2 we gained a third alternative in Core Text promising full control over styles, thread safety and performance. However for most of my apps I did not want to break 3.x compatibility and so I procrastinated looking at this powerful new API. Apps running only on iPads could have made use of Core Text from day 1, but to me it made more sense supporting iPad via hybrid apps where the iPhone part would still be backwards compatible.\
Now as the year has turned the adoption of 4.x on all iOS platforms is ever more accelerating. Many new iPads where found under the Christmas tree and by now even the most stubborn people (read needing 3.x for jailbreaking and sim-unlocking) have little reason to stick with 3.x. Thus we have almost no incentive left to stick with 3.x compatibility. Yay!”; /* … */

//创建AttributeString
NSMutableAttributedString *string = [[NSMutableAttributedString alloc]
initWithString:longText];

//创建字体以及字体大小
CTFontRef helvetica = CTFontCreateWithName(CFSTR(”Helvetica”), 14.0, NULL);
CTFontRef helveticaBold = CTFontCreateWithName(CFSTR(”Helvetica-Bold”), 14.0, NULL);

//添加字体 目标字符串从下标0开始到字符串结尾
[string addAttribute:(id)kCTFontAttributeName
value:(id)helvetica
range:NSMakeRange(0, [string length])];

//添加字体 目标字符串从下标0开始,截止到4个单位的长度
[string addAttribute:(id)kCTFontAttributeName
value:(id)helveticaBold
range:NSMakeRange(0, 4)];

//添加字体 目标字符串从下标6开始,截止到5个单位长度
[string addAttribute:(id)kCTFontAttributeName
value:(id)helveticaBold
range:NSMakeRange(6, 5)];

//添加字体 目标字符串从下标109开始,截止到9个单位长度
[string addAttribute:(id)kCTFontAttributeName
value:(id)helveticaBold
range:NSMakeRange(109, 9)];

//添加字体 目标字符串从下标223开始,截止到6个单位长度
[string addAttribute:(id)kCTFontAttributeName
value:(id)helveticaBold
range:NSMakeRange(223, 6)];

//添加颜色,目标字符串从下标0开始,截止到4个单位长度
[string addAttribute:(id)kCTForegroundColorAttributeName
value:(id)[UIColor blueColor].CGColor
range:NSMakeRange(0, 4)];

//添加过程同上
[string addAttribute:(id)kCTForegroundColorAttributeName
value:(id)[UIColor redColor].CGColor
range:NSMakeRange(18, 3)];

[string addAttribute:(id)kCTForegroundColorAttributeName
value:(id)[UIColor greenColor].CGColor
range:NSMakeRange(657, 6)];

[string addAttribute:(id)kCTForegroundColorAttributeName
value:(id)[UIColor blueColor].CGColor
range:NSMakeRange(153, 6)];

//创建文本对齐方式
CTTextAlignment alignment = kCTLeftTextAlignment;//左对齐 kCTRightTextAlignment为右对齐
CTParagraphStyleSetting alignmentStyle;
alignmentStyle.spec=kCTParagraphStyleSpecifierAlignment;//指定为对齐属性
alignmentStyle.valueSize=sizeof(alignment);
alignmentStyle.value=&alignment;

//创建文本行间距
CGFloat lineSpace=5.0f;//间距数据
CTParagraphStyleSetting lineSpaceStyle;
lineSpaceStyle.spec=kCTParagraphStyleSpecifierLineSpacing;//指定为行间距属性
lineSpaceStyle.valueSize=sizeof(lineSpace);
lineSpaceStyle.value=&lineSpace;

//创建样式数组
CTParagraphStyleSetting settings[]={
alignmentStyle,lineSpaceStyle
};

//设置样式
CTParagraphStyleRef paragraphStyle = CTParagraphStyleCreate(settings, sizeof(settings));

//给字符串添加样式attribute
[string addAttribute:(id)kCTParagraphStyleAttributeName
value:(id)paragraphStyle
range:NSMakeRange(0, [string length])];

// layout master
CTFramesetterRef framesetter = CTFramesetterCreateWithAttributedString(
(CFAttributedStringRef)string);

CGMutablePathRef leftColumnPath = CGPathCreateMutable();
CGPathAddRect(leftColumnPath, NULL,
CGRectMake(0, 0,
self.bounds.size.width,
self.bounds.size.height));

CTFrameRef leftFrame = CTFramesetterCreateFrame(framesetter,
CFRangeMake(0, 0),
leftColumnPath, NULL);

// flip the coordinate system
CGContextRef context = UIGraphicsGetCurrentContext();
CGContextSetTextMatrix(context, CGAffineTransformIdentity);
CGContextTranslateCTM(context, 0, self.bounds.size.height);
CGContextScaleCTM(context, 1.0, -1.0);

// draw
CTFrameDraw(leftFrame, context);

// cleanup

CGPathRelease(leftColumnPath);
CFRelease(framesetter);
CFRelease(helvetica);
CFRelease(helveticaBold);
[string release];
UIGraphicsPushContext(context);

}

2010年07月16日

url设计,javascript开发需要注意的问题

类归于: web开发 — admin @ 2:49 下午

url

遨游浏览器默认有个过滤广告的功能,从他的屏蔽策略来看,主要是针对某些关键字进行了处理,当url符合屏蔽规则的时候,遨游浏览器将不会对此url进行执行,直接给你一个白页,如果是url是js的地址,此js不会被执行,如果是图片地址,图片将不会被看到.

遨游广告过滤策略节选:

*/ad/*

*/ad.htm*

*/ads.*

*/banner.*

………

所以在开发的时候尽量不要使用此规则的url,很容易被遨游等具有广告过滤功能的浏览器进行屏蔽,导致页面错误。

你做的页面被很多用户进行浏览,用户的浏览器各种各样,不同的浏览器过滤规则很多,只能说是见到一个记住一个。我们改变不了用户的浏览器,只能改变自己的 程序。

+++++++++++++++  分割线 ++++++++++++++++++++++++++++

ie 6、7  下 开发javascript

以javascript为例来说明,这里要说的问题还是与用户的浏览器有关,而且还有杀毒软件。

部分杀毒软件有对浏览器保护的功能,但是毕竟是机器,不够智能。

举例一段js代码:

var o=document.getElementById(’pid’);
o.style.cssText=”display:none”;
o.style.cssText=”display:block”;
第二句式隐藏元素,第三句是现实元素。
我的机器曾经安装过瑞星卡卡,瑞星卡卡,对此代码会做干扰,
当你的这个元素的width height在300px的范围内,回起作用,作用是什么呢,如下解释:
第二句执行的时候,会监控此元素
第三句执行时,会判断,id=pid的元素在页面中的位置是否有变化,变化了几次,如果位置变化了而且显示属性也变化,就会把此元素从页面dom中删除。
这时如果再执行var o=document.getElementById(’pid’);获得元素时,o元素就是null。
此问题的发现过程很郁闷:
我使用的是遨游浏览器,开着瑞星卡卡,然后运行相关js代码,发现,运行几次就会报错,到firefox下面运行时,没有任何错误。
当我使用xp自带的ie浏览器时,突然发现,当我的id=pid的元素被瑞星卡卡干掉的时候,他会在页面显示一个瑞星卡卡的图片,意思就是此元素为浮动广告,已删除。这个问题应该怪狮子卡卡吧。下面的问题就应该怪浏览器了。
遨游浏览器下,在使用google map的时候,如果拖动小图钉进行定位90%都会被浏览器当做浮动广告干掉。这时只能对遨游进行设置,把过滤浮动广告的功能关掉。
总结:
1,如果要使用javascript来实现弹出层页面效果,最好使用创建添加元素的方式,尽量不要使用display:none/block的方式,很容易被某些浏览器与杀毒软件干掉.

2,如果事情不是你能控制的例如google map 遨游中的问题,那么。。。。。只能看运气了

3,所以,不是所有bug都是程序员的问题,而是外界某些原因造成。在修复类似bug的时候就要注意,如果你的程序100%找不到错误,那么就从使用的工具入手来看看。

WordPress 所驱动